Rapid Hot/Cold Transition Testing to MIL-STD-810, MIL-STD-883, and IEC 60068-2-14
Solder joints, encapsulation, and bonded material interfaces can survive gradual temperature cycling that would reveal a defect immediately under a rapid, extreme transition — which is exactly the gap thermal shock testing is designed to close. Rather than ramping temperature within one chamber, thermal shock testing exposes the product to a near-instantaneous step between hot and cold, stressing interfaces and joints far more aggressively than a slow ramp would.
Sonacme's thermal shock chambers come in two-zone and three-zone designs, each in six sizes from 50L to 1000L. The two-zone chambers move the product in a basket between a hot zone and a cold zone, and cover MIL-STD-810, MIL-STD-883, IEC 60068-2-14 and applicable JEDEC methods. The three-zone chambers use damper switching instead of a moving basket, and Sonacme lists them against MIL-STD-883, ISO 26262 (road vehicle functional safety) and IEC 61508. Sonacme also offers vertical, horizontal and liquid configurations.
Within each design, temperature performance is the same across the range, so the choice of model comes down to test space and load capacity. The tables below compare every model and link to its full specifications.
The chambers use LOW GWP R-449A refrigerant, cutting energy use by up to 40% compared to standard refrigerants, and DANFOSS and SAGINOMIYA solenoid valves for reliable refrigerant flow control across the repeated, high-cycle-count operation thermal shock testing typically demands.
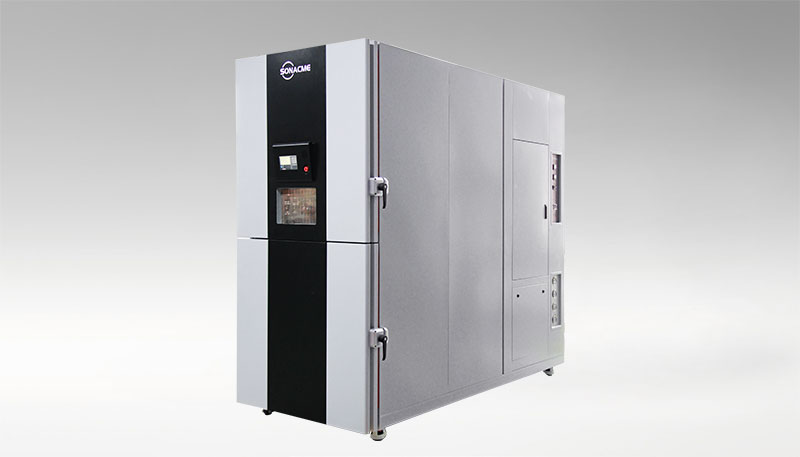

| Hot zone range | +60 to +200°C |
| Cold zone range | A: −40 to 0°C · B: −55 to 0°C · C: −65 to 0°C (choose the grade when ordering) |
| Transfer method | Basket moves between the hot and cold zones |
| Standards referenced | MIL-STD-810, MIL-STD-883, IEC 60068-2-14, JEDEC |
Temperature performance is the same across the range, so choose by test space (the largest product or fixture you need to fit) and load capacity (the total mass in the basket). Check the external size against your floor space. Click a model for its full specifications.
| Model | Volume | Test space W×H×D (mm) | Max load | External size W×H×D (mm) |
|---|---|---|---|---|
| SS/50/65/2 | 50L | 350×400×350 | 30kg | 965×2010×1524 |
| SS/100/65/2 | 100L | 450×500×450 | 30kg | 1050×2050×1650 |
| SS/200/65/2 | 200L | 650×460×670 | 50kg | 1300×2050×1900 |
| SS/300/65/2 | 300L | 960×460×670 | 50kg | 1700×2050×1900 |
| SS/500/65/2 | 500L | 960×650×800 | 100kg | 1700×2350×2150 |
| SS/1000/65/2 | 1000L | 1100×900×1000 | 100kg | 2000×2550×2400 |
| Volume | 50L |
| Test space (W×H×D) | 350×400×350mm |
| External size (W×H×D) | 965×2010×1524mm |
| Test area load capacity | 30kg |
| Hot zone | +60 to +200°C |
| Cold zone | A: −40 to 0°C · B: −55 to 0°C · C: −65 to 0°C |
| Transfer | Basket switching between zones |
| Volume | 100L |
| Test space (W×H×D) | 450×500×450mm |
| External size (W×H×D) | 1050×2050×1650mm |
| Test area load capacity | 30kg |
| Hot zone | +60 to +200°C |
| Cold zone | A: −40 to 0°C · B: −55 to 0°C · C: −65 to 0°C |
| Transfer | Basket switching between zones |
| Volume | 200L |
| Test space (W×H×D) | 650×460×670mm |
| External size (W×H×D) | 1300×2050×1900mm |
| Test area load capacity | 50kg |
| Hot zone | +60 to +200°C |
| Cold zone | A: −40 to 0°C · B: −55 to 0°C · C: −65 to 0°C |
| Transfer | Basket switching between zones |
| Volume | 300L |
| Test space (W×H×D) | 960×460×670mm |
| External size (W×H×D) | 1700×2050×1900mm |
| Test area load capacity | 50kg |
| Hot zone | +60 to +200°C |
| Cold zone | A: −40 to 0°C · B: −55 to 0°C · C: −65 to 0°C |
| Transfer | Basket switching between zones |
| Volume | 500L |
| Test space (W×H×D) | 960×650×800mm |
| External size (W×H×D) | 1700×2350×2150mm |
| Test area load capacity | 100kg |
| Hot zone | +60 to +200°C |
| Cold zone | A: −40 to 0°C · B: −55 to 0°C · C: −65 to 0°C |
| Transfer | Basket switching between zones |
| Volume | 1000L |
| Test space (W×H×D) | 1100×900×1000mm |
| External size (W×H×D) | 2000×2550×2400mm |
| Test area load capacity | 100kg |
| Hot zone | +60 to +200°C |
| Cold zone | A: −40 to 0°C · B: −55 to 0°C · C: −65 to 0°C |
| Transfer | Basket switching between zones |

| Hot zone range | +60 to +200°C |
| Heating time | Ambient to +200°C within 15 minutes |
| Cold zone range | A: −40 to 0°C · B: −55 to 0°C · C: −65 to 0°C (choose the grade when ordering) |
| Cooling time | Ambient to −75°C in 40–50 minutes, depending on size |
| Switching method | Damper switching |
| Standards referenced | MIL-STD-883, ISO 26262, IEC 61508 |
As with the two-zone series, choose by test space and load capacity. Larger chambers take a little longer to pull down to −75°C, and the three-zone cabinets are wider than the equivalent two-zone models.
| Model | Volume | Test space W×H×D (mm) | Max load | Cool-down to −75°C | External size W×H×D (mm) |
|---|---|---|---|---|---|
| SS/50/65/3 | 50L | 350×400×350 | 30kg | 40 min | 1330×2010×1524 |
| SS/100/65/3 | 100L | 450×500×450 | 30kg | 40 min | 1450×2050×1650 |
| SS/200/65/3 | 200L | 650×460×670 | 50kg | 40 min | 1650×2050×1900 |
| SS/300/65/3 | 300L | 960×460×670 | 50kg | 45 min | 1980×2050×2000 |
| SS/500/65/3 | 500L | 960×650×800 | 100kg | 45 min | 1980×2250×2400 |
| SS/1000/65/3 | 1000L | 1100×900×1000 | 100kg | 50 min | 2050×2250×2400 |
| Volume | 50L |
| Test space (W×H×D) | 350×400×350mm |
| External size (W×H×D) | 1330×2010×1524mm |
| Test area load capacity | 30kg |
| Hot zone | +60 to +200°C, ambient to +200°C within 15 min |
| Cold zone | A: −40 to 0°C · B: −55 to 0°C · C: −65 to 0°C |
| Cooling time | Ambient to −75°C within 40 min |
| Switching | Damper switching |
| Volume | 100L |
| Test space (W×H×D) | 450×500×450mm |
| External size (W×H×D) | 1450×2050×1650mm |
| Test area load capacity | 30kg |
| Hot zone | +60 to +200°C, ambient to +200°C within 15 min |
| Cold zone | A: −40 to 0°C · B: −55 to 0°C · C: −65 to 0°C |
| Cooling time | Ambient to −75°C within 40 min |
| Switching | Damper switching |
| Volume | 200L |
| Test space (W×H×D) | 650×460×670mm |
| External size (W×H×D) | 1650×2050×1900mm |
| Test area load capacity | 50kg |
| Hot zone | +60 to +200°C, ambient to +200°C within 15 min |
| Cold zone | A: −40 to 0°C · B: −55 to 0°C · C: −65 to 0°C |
| Cooling time | Ambient to −75°C within 40 min |
| Switching | Damper switching |
| Volume | 300L |
| Test space (W×H×D) | 960×460×670mm |
| External size (W×H×D) | 1980×2050×2000mm |
| Test area load capacity | 50kg |
| Hot zone | +60 to +200°C, ambient to +200°C within 15 min |
| Cold zone | A: −40 to 0°C · B: −55 to 0°C · C: −65 to 0°C |
| Cooling time | Ambient to −75°C within 45 min |
| Switching | Damper switching |
| Volume | 500L |
| Test space (W×H×D) | 960×650×800mm |
| External size (W×H×D) | 1980×2250×2400mm |
| Test area load capacity | 100kg |
| Hot zone | +60 to +200°C, ambient to +200°C within 15 min |
| Cold zone | A: −40 to 0°C · B: −55 to 0°C · C: −65 to 0°C |
| Cooling time | Ambient to −75°C within 45 min |
| Switching | Damper switching |
| Volume | 1000L |
| Test space (W×H×D) | 1100×900×1000mm |
| External size (W×H×D) | 2050×2250×2400mm |
| Test area load capacity | 100kg |
| Hot zone | +60 to +200°C, ambient to +200°C within 15 min |
| Cold zone | A: −40 to 0°C · B: −55 to 0°C · C: −65 to 0°C |
| Cooling time | Ambient to −75°C within 50 min |
| Switching | Damper switching |